Loading Ramps
Not really wanting to hoist the mirror box of my 18" Obsession into the
back of my Honda Minivan, I ordered some ramp ends...
Loading ramps for your Obsession--Call Northern Supply 800-533-5545. This is
a mail order catalog outfit that sells ramp kits. The ramp kits are
inexpensive, easily attached to ordinary wood planks, and lap over the loading
edge of your trailer or vehicle. They also sell collapsible ramps.
Also check out www.ramparts.com,
800-234-6992.
I have had a request for more information on the ramps I made, so I have
tried to document the design / construction choices I made in the information
below.
First buy the end kits. Then I would recommend 10 inches of ramp length
for each 3 inches of height you are trying to reach. My ramps are 72 inches long
(finished size) to to allow easy loading of my mirror box up
into my Honda Accord minivan with a rear deck height of 21.5"
Recommended ramp lengths from my ramp kit manufacturer are listed below:
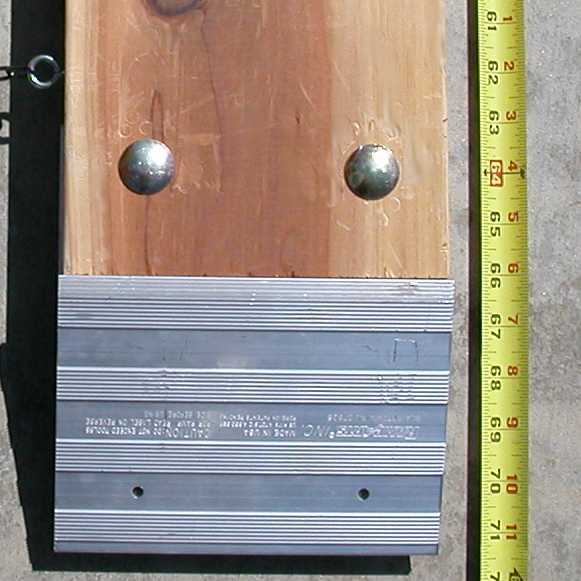
I chose to buy some 2x8" redwood boards that I sanded and finished
prior to drilling the bolt holes for the ramp ends. It has resulted in a
fine pair of ramps. A bit of overkill for a pair of ramps, but they look
real nice and are extremely functional.
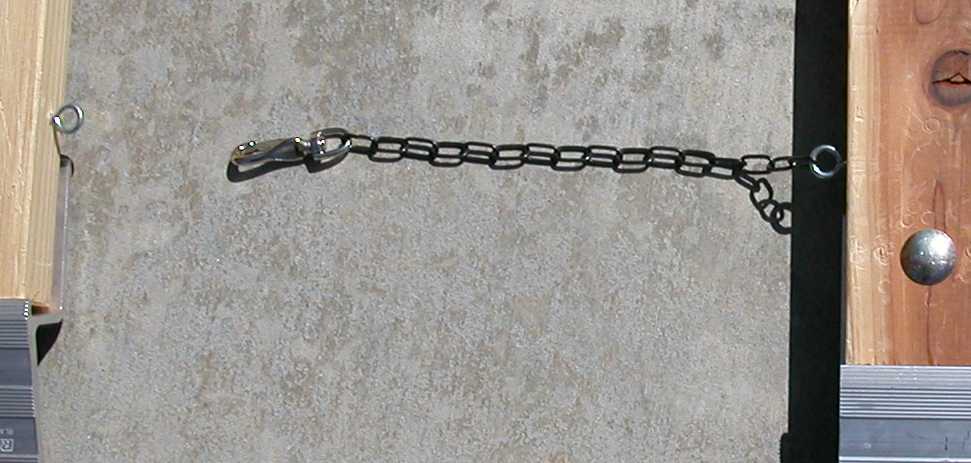
My friend Terry suggested that I link the upper ends together and lower
ends together on the ramps to keep a fixed distance between the boards even
when they are bumped during the loading process. This idea has already
saved me from dumping my scope twice. I attached eyebolts and a length
of chain with a clip fastener at one end so I could easily hook the ramps
together and disconnect them afterwards.
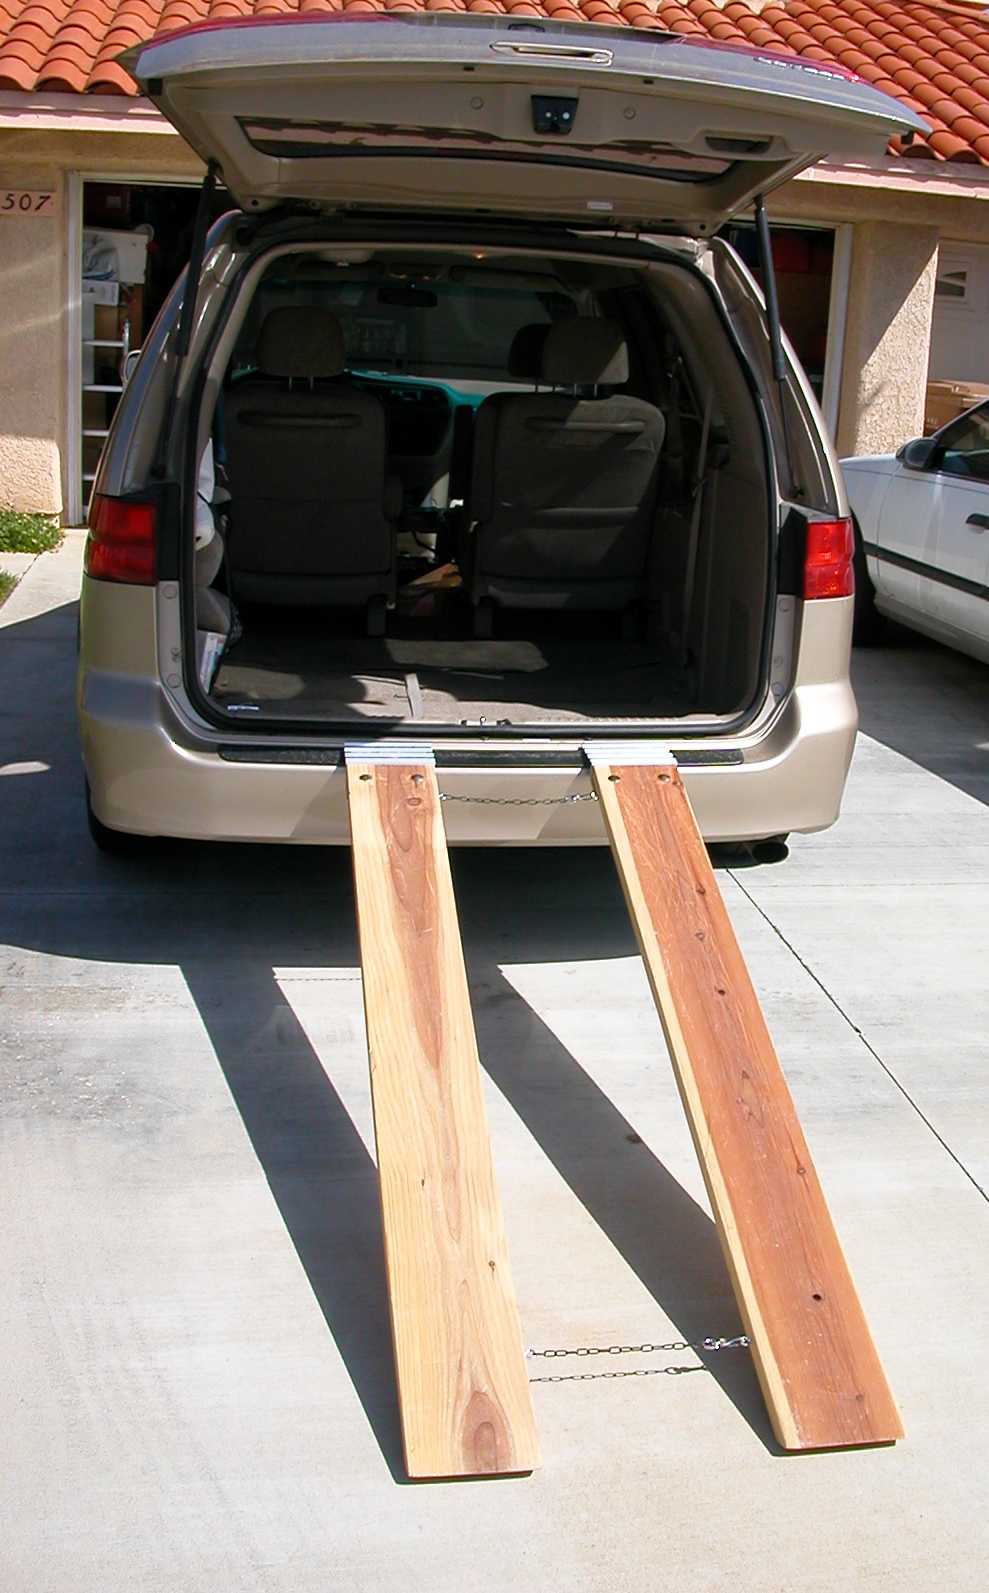
| The ramps positioned for telescope loading. Notice the
two chains hooking the ramps together to prevent spreading at 4 in the
morning when you are loading up. The bottom chain is a tripping
hazard the first couple times you load, but you get used to it real quick
and I figure that it's worth it to keep an expensive mirror from making a
really bad noise on the pavement one night! |
 |
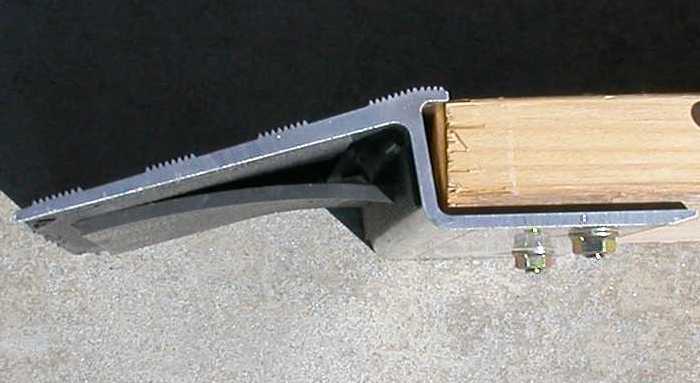
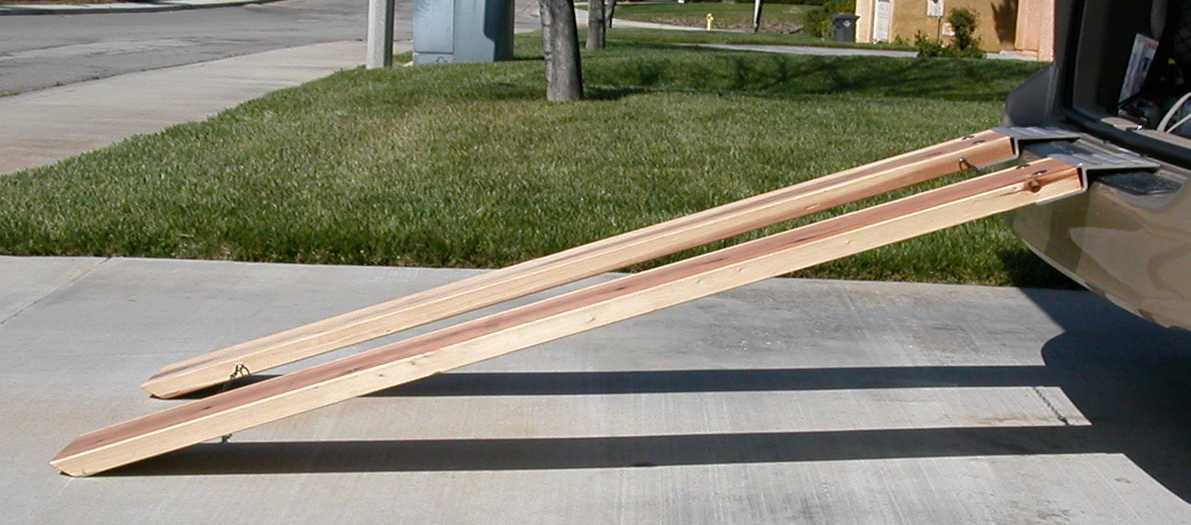
| Side view. Note the mitre cut at the bottom of the
ramps. While it isn't perfectly flush with the ground, I've found
that a 45 degree cut is very durable, and the wheelbarrow tires roll
smoothly over it. Right click and "View Image" for larger
views of all of these images. |
 |
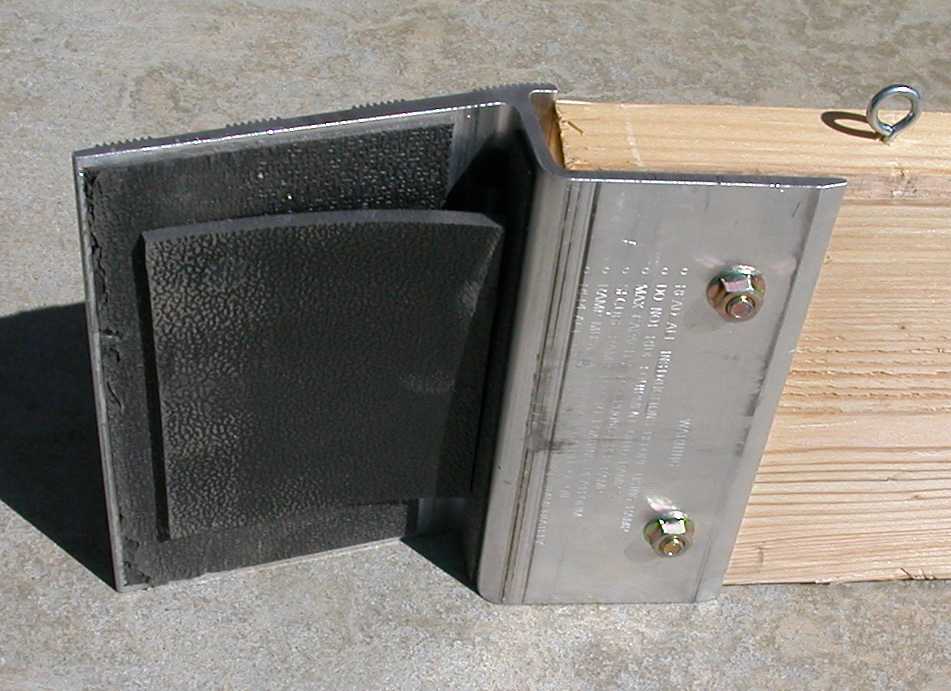
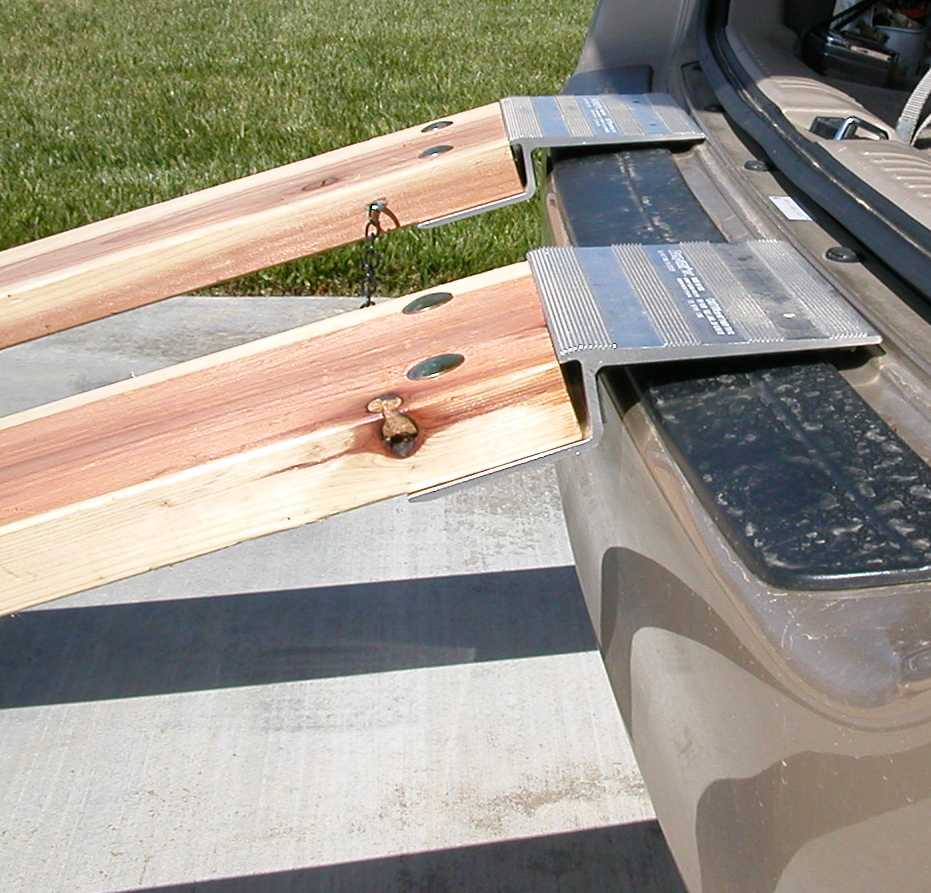
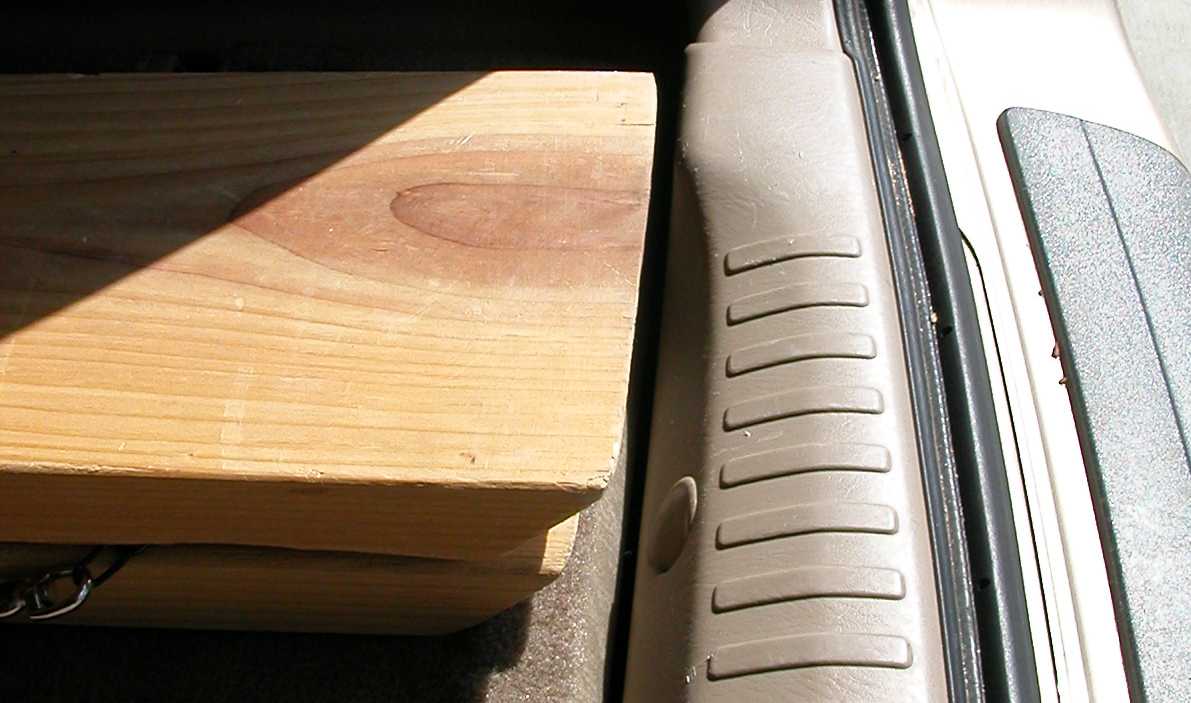
| Close up of ramp / vehicle bumper interface. The
wheelbarrow tires also roll very easily over the rubber door seal in the
upper right hand portion of the image. |
 |
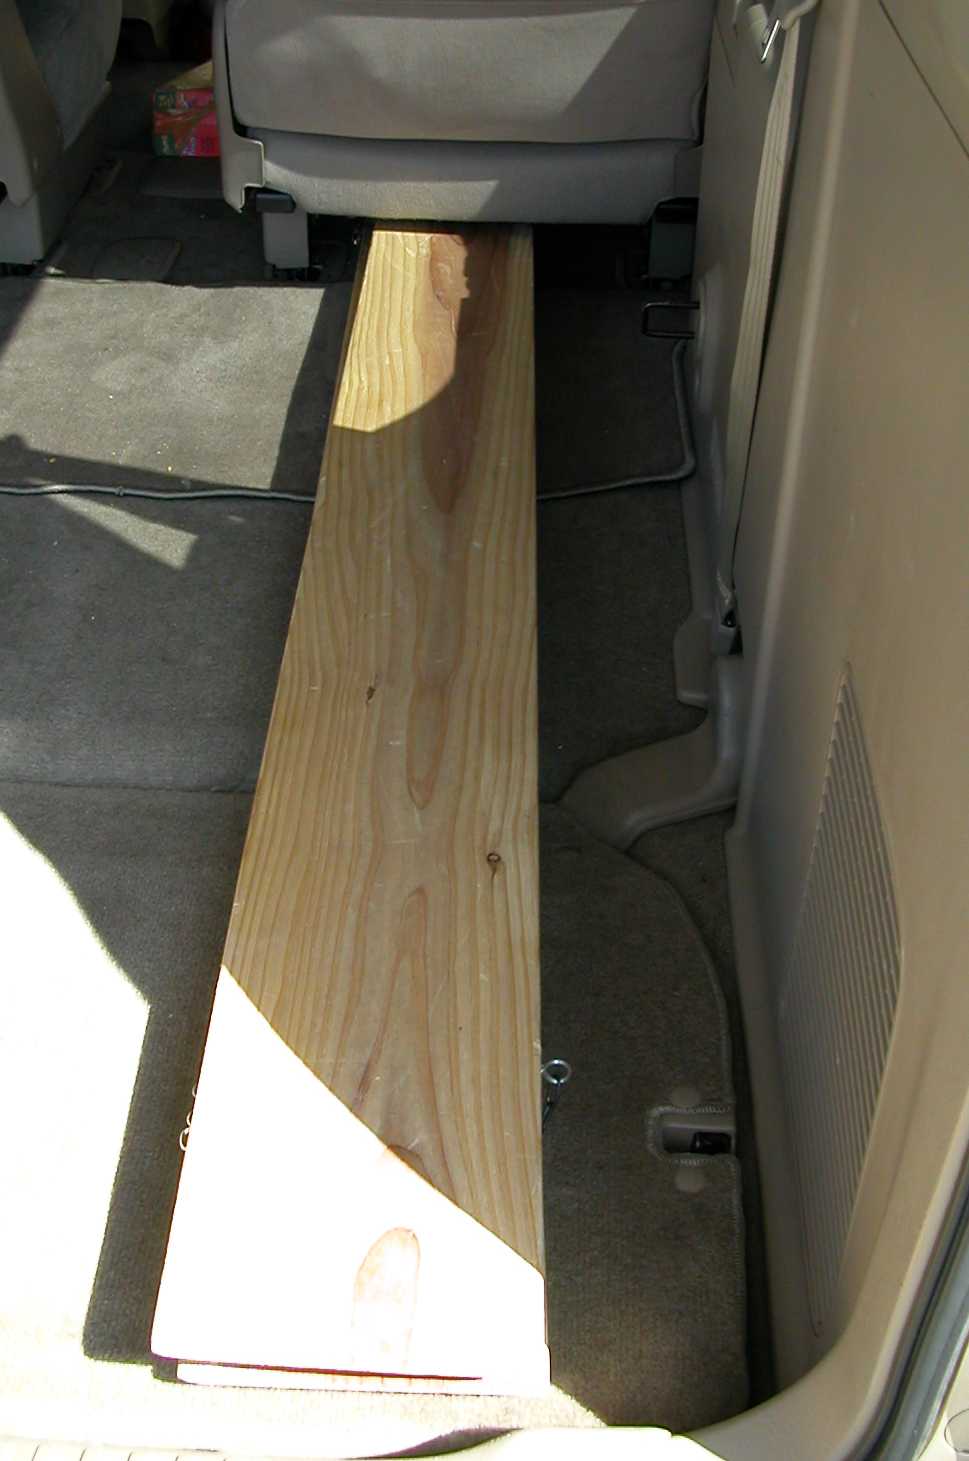
| The ramps fit inside the van under the rear passenger side
seat either stacked on top of each other or side by side. Their
length allows them to allow the rear door to be closed without hitting a
handle on the right side of the door. I measured this distance
before I made the ramps. |
 |
 |
|