
|
|
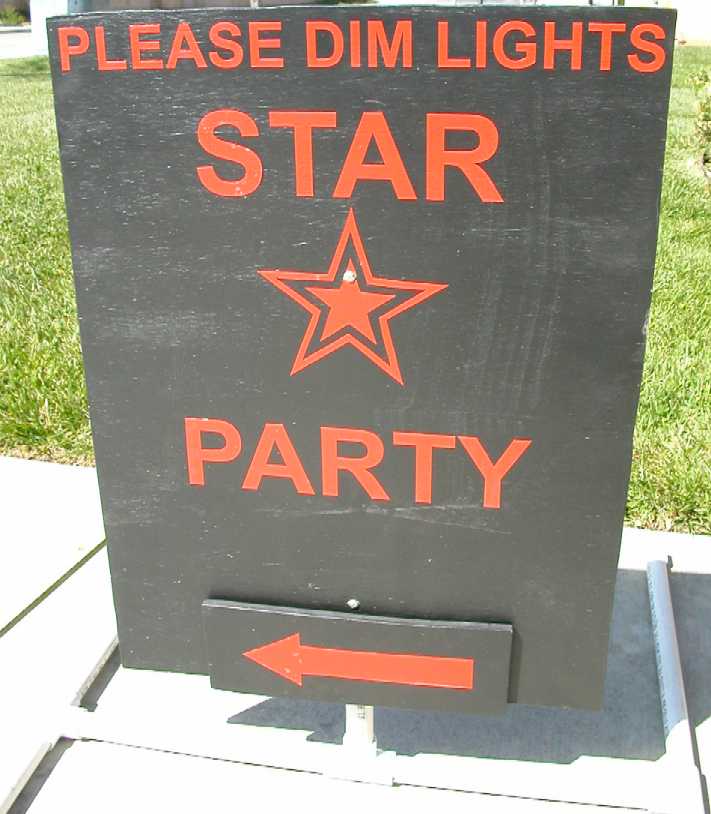
Making "Star Party" Signs for Your Club EventsIt's hard enough for club members to make their way down dark roads to the star party when they're running late. The general public always has problems knowing where to go... Why not make some transportable signs to direct people?
We have some pretty strong and continuous winds during the day where I live, so I opted to go with a low profile design. I haven't had one tip over yet.
Parts ListTo make one (1) sign:
PlanningI started the project by laying out what I wanted the sign to say on my computer using PowerPoint just because I know how to use this program fairly well. A word processor could have worked just as well. After planning what word would appear on what line, I printed out each letter on a sheet of paper at the size and thickness that I was going to need. I cut each letter out carefully and traced them onto the reflective sheet. Cutting out the letters with the Exacto knife is not the fun part of this project! I made some stars on my computer and printed them out at different sizes. I used a couple of closely sized ones for the 'star-in-star' pattern, first cutting them out on paper and then tracing them on the reflective sheet. Cut and prepare the plywoodCut out, sand, then paint both plywood pieces. I gave the sheets a couple base coats of polyurethane and let them dry before I stuck the letter on to give them a good, non-porous surface to adhere to. Now we'll assemble the base:Cut one of the 6 ft sections of PVC in half, and then in half again. Test assemble then glue the sides of the "H" with these pieces, two of the "T"s and the four end caps. See the picture: (Make two of these)
Cut the other 6 ft section of PVC as follows: two 18" pieces and one 24" piece.
Next, DO NOT GLUE but place the 24" piece in the "T" between the 18" pieces. You will use this as a handle to make sure the center "T" is aligned vertically when gluing the "H" together. When gluing PVC, you only have a second or two to get the pipe aligned before they are joined. You have to get this next step right or your sign will be crooked.
Filling the BaseUsing a funnel, pour sand into one side of the "H" through the center "T" until its about 1" from the junction. Roll it side to side to get it really filled up. Squirt some silicone caulk into the hole on that side of the "H" to block the sand in. Let this dry for a couple of hours so it will really hold the sand in.. Turn the "H" around and use the funnel to fill the other side with sand. squirt enough silicone down the hole to fill up the void to within 1 1/2 inches of the top of the "T". Leave enough room to put the sign post in the hole!
Back to the Sign - Lay Out the LettersCarefully lay out the letters on the sign board. Use light pencil lines to keep your lines straight. Press the letters down securely. Coat the entire sign with three or four coats of polyurethane. Let dry. Lay the arrow out onto the smaller piece of plywood. Press the arrow down securely. Coat the entire piece (front and back for this piece) with three or four coats of polyurethane. Let dry. Drill the holes...
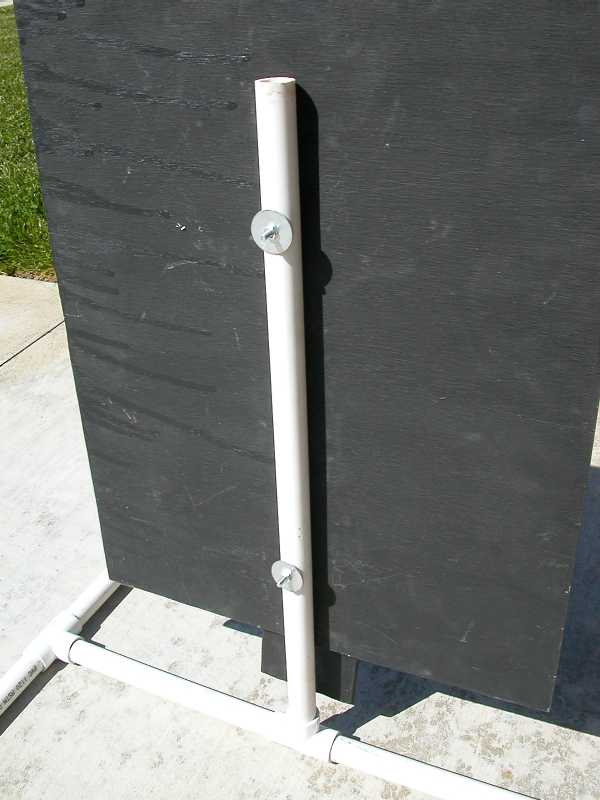
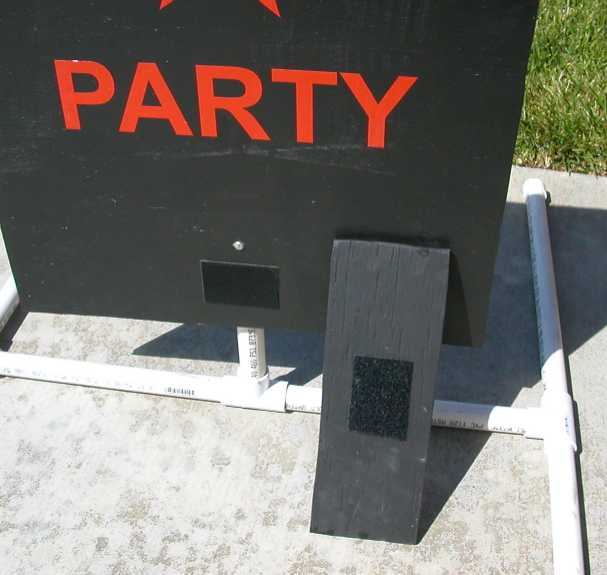
Final AssemblyPush the pipe over the bolts, put the washers on and secure the sign to the pipe using the nuts. Tighten until the pipe begins to deform a little bit to get a snug fit. Test fit the arrow on the sign so that it can clear the ground when pointing up, and is centered when pointing either left of right. Put the piece of Velcro (the hook side) on the sign. I recommend Put the fuzzy side on the back of the arrow.
Stand the sign up in the base. Congratulations!!
11/2011 |
|